Features for teachers
Organize students into classes with a join code, see what they practiced, set goals and homework, plan lessons and send exercises.
Manage your students
Everything starts on My teaching (after you sign in). Press Invite student, enter an email address and press Send invitation. Pick the language of the invitation first: English or Polish. A student who already has an account gets an email and a message on the dashboard. Anyone else gets an email with a sign-up link that creates the account and accepts the invitation in one step. The link expires after 14 days.
Two tick boxes in the same form hand your own settings, or the exercise you have open, to the student as a starting point. When the student accepts, you see a message on your dashboard and the student appears in the roster. Invite a parent, next to the first button, invites the parent of one of your students.
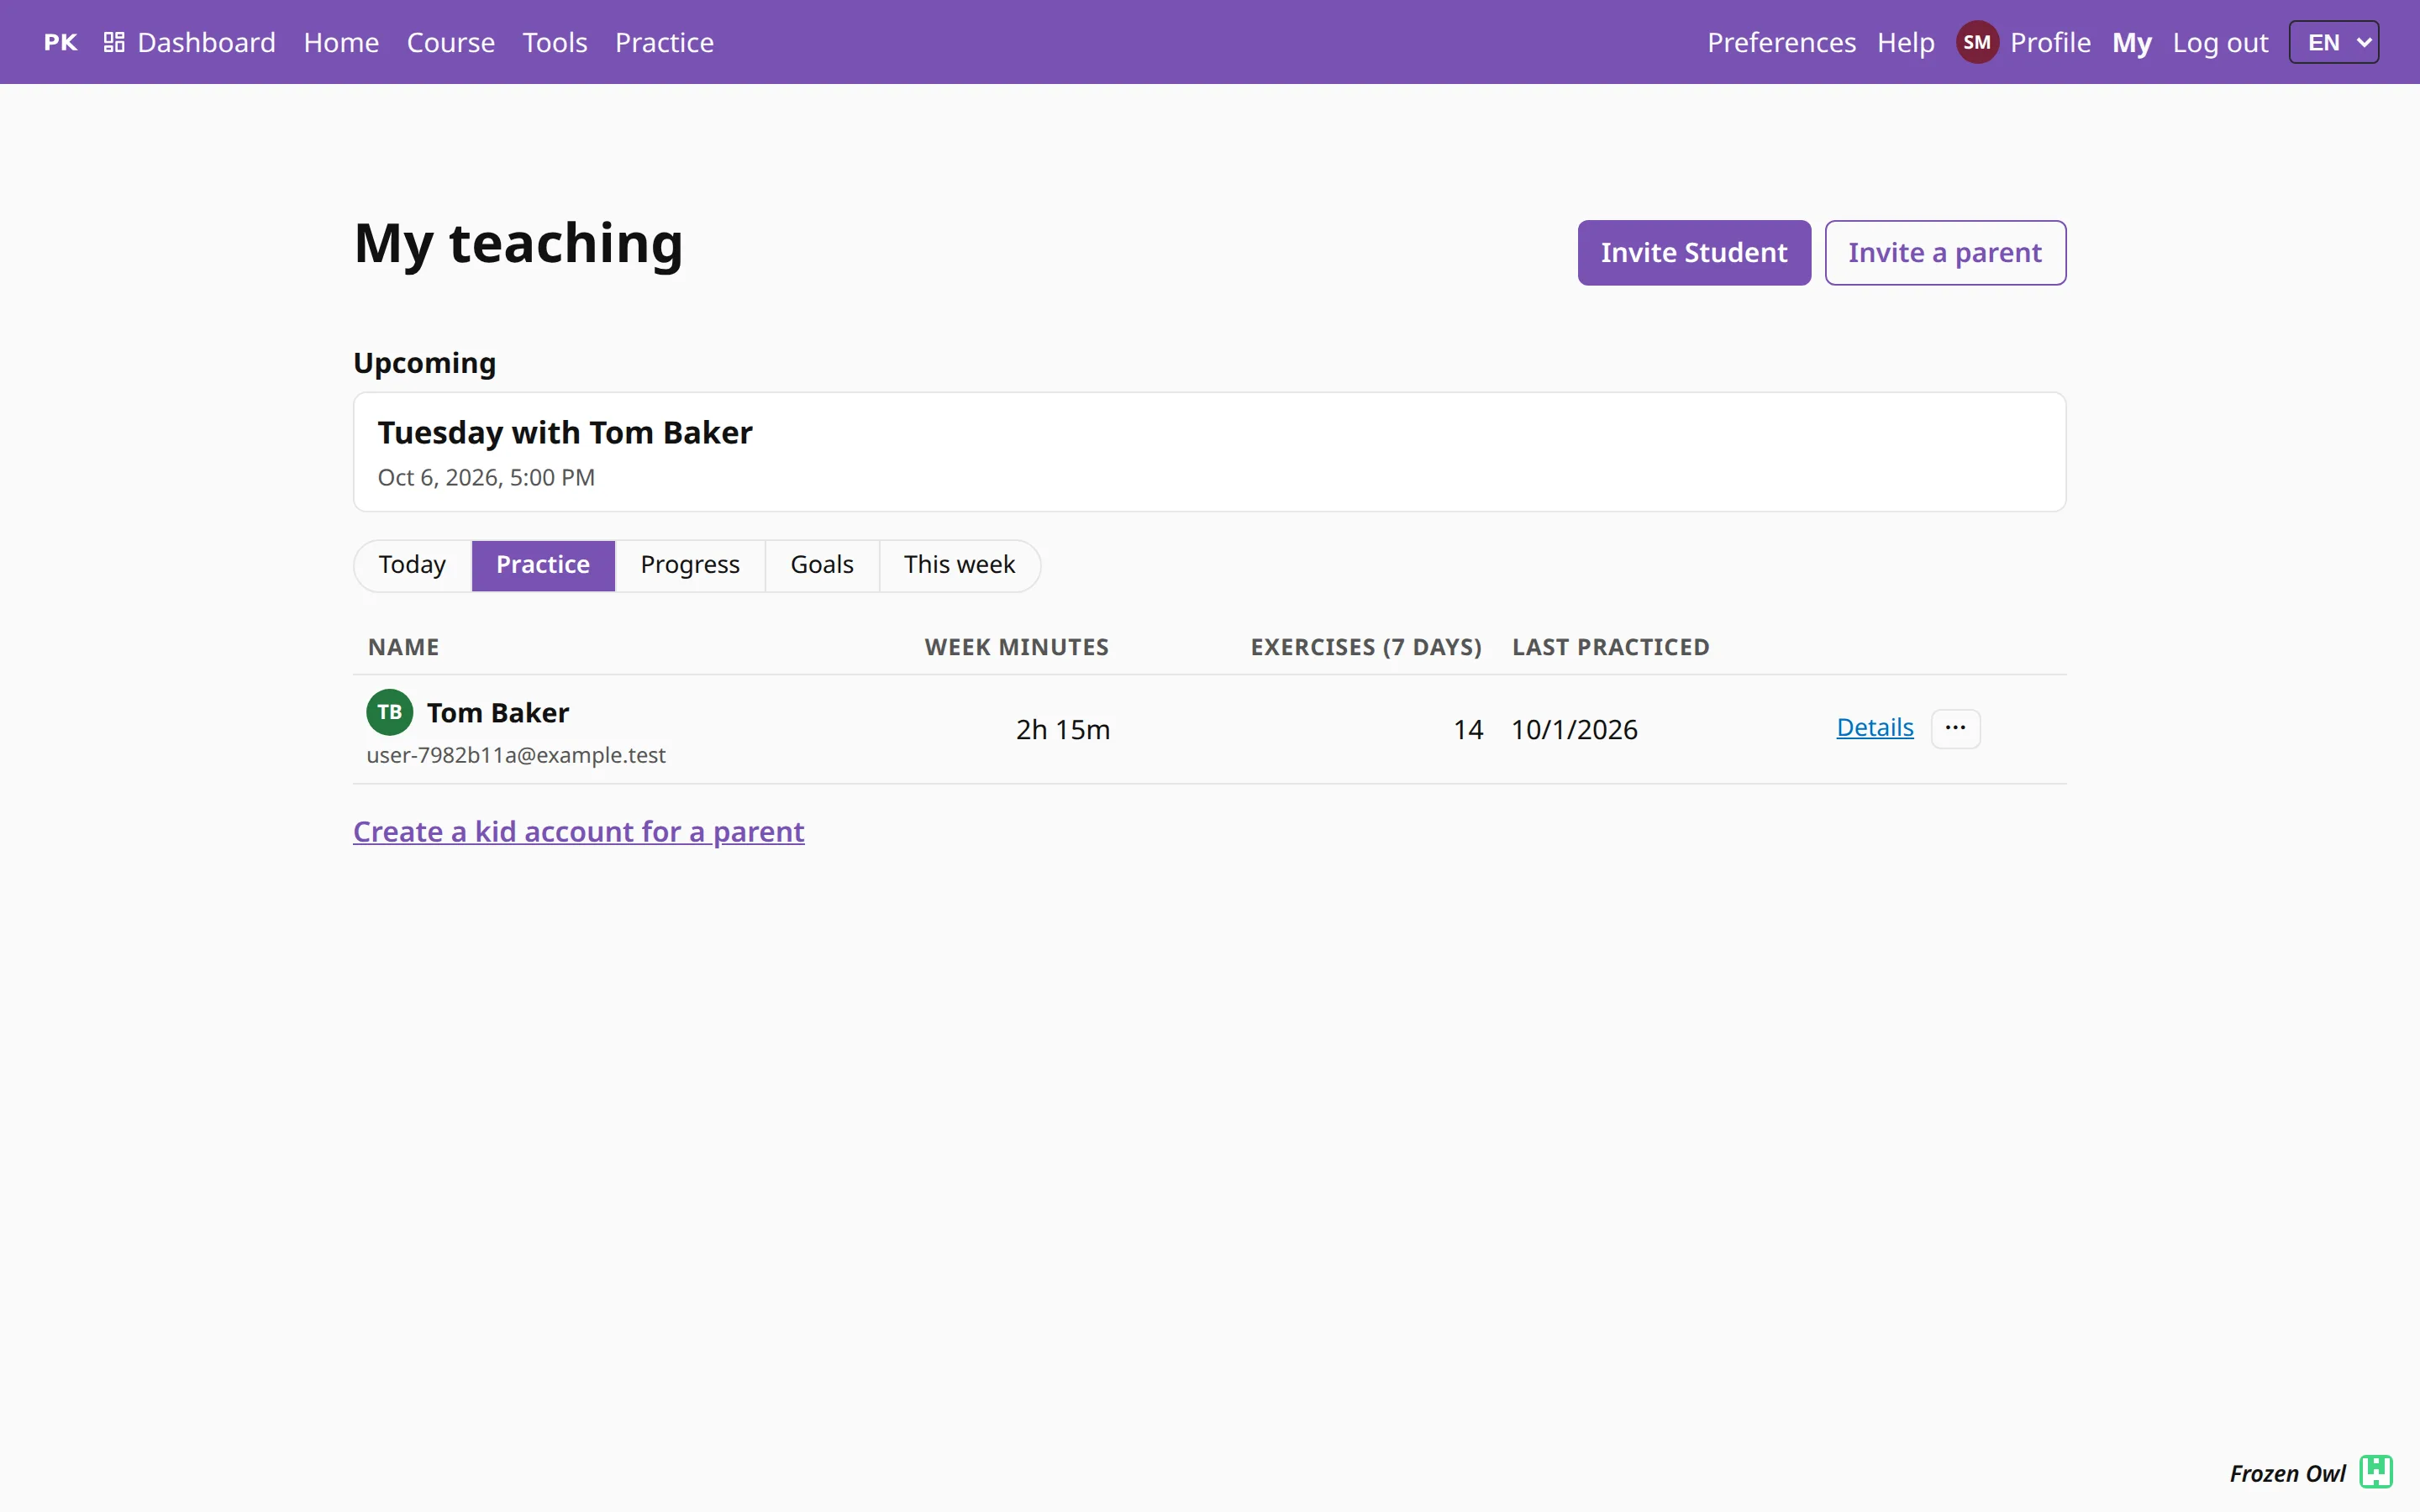
A student who is too young for an email address gets a kid account. Press Create a kid account for a parent under the roster and enter the email of a parent who is already connected to you, the child’s name and a password. The child joins your students and the parent manages the account (see For parents). A student can end the connection under My teachers & parents on their own People page.
Organize students into classes
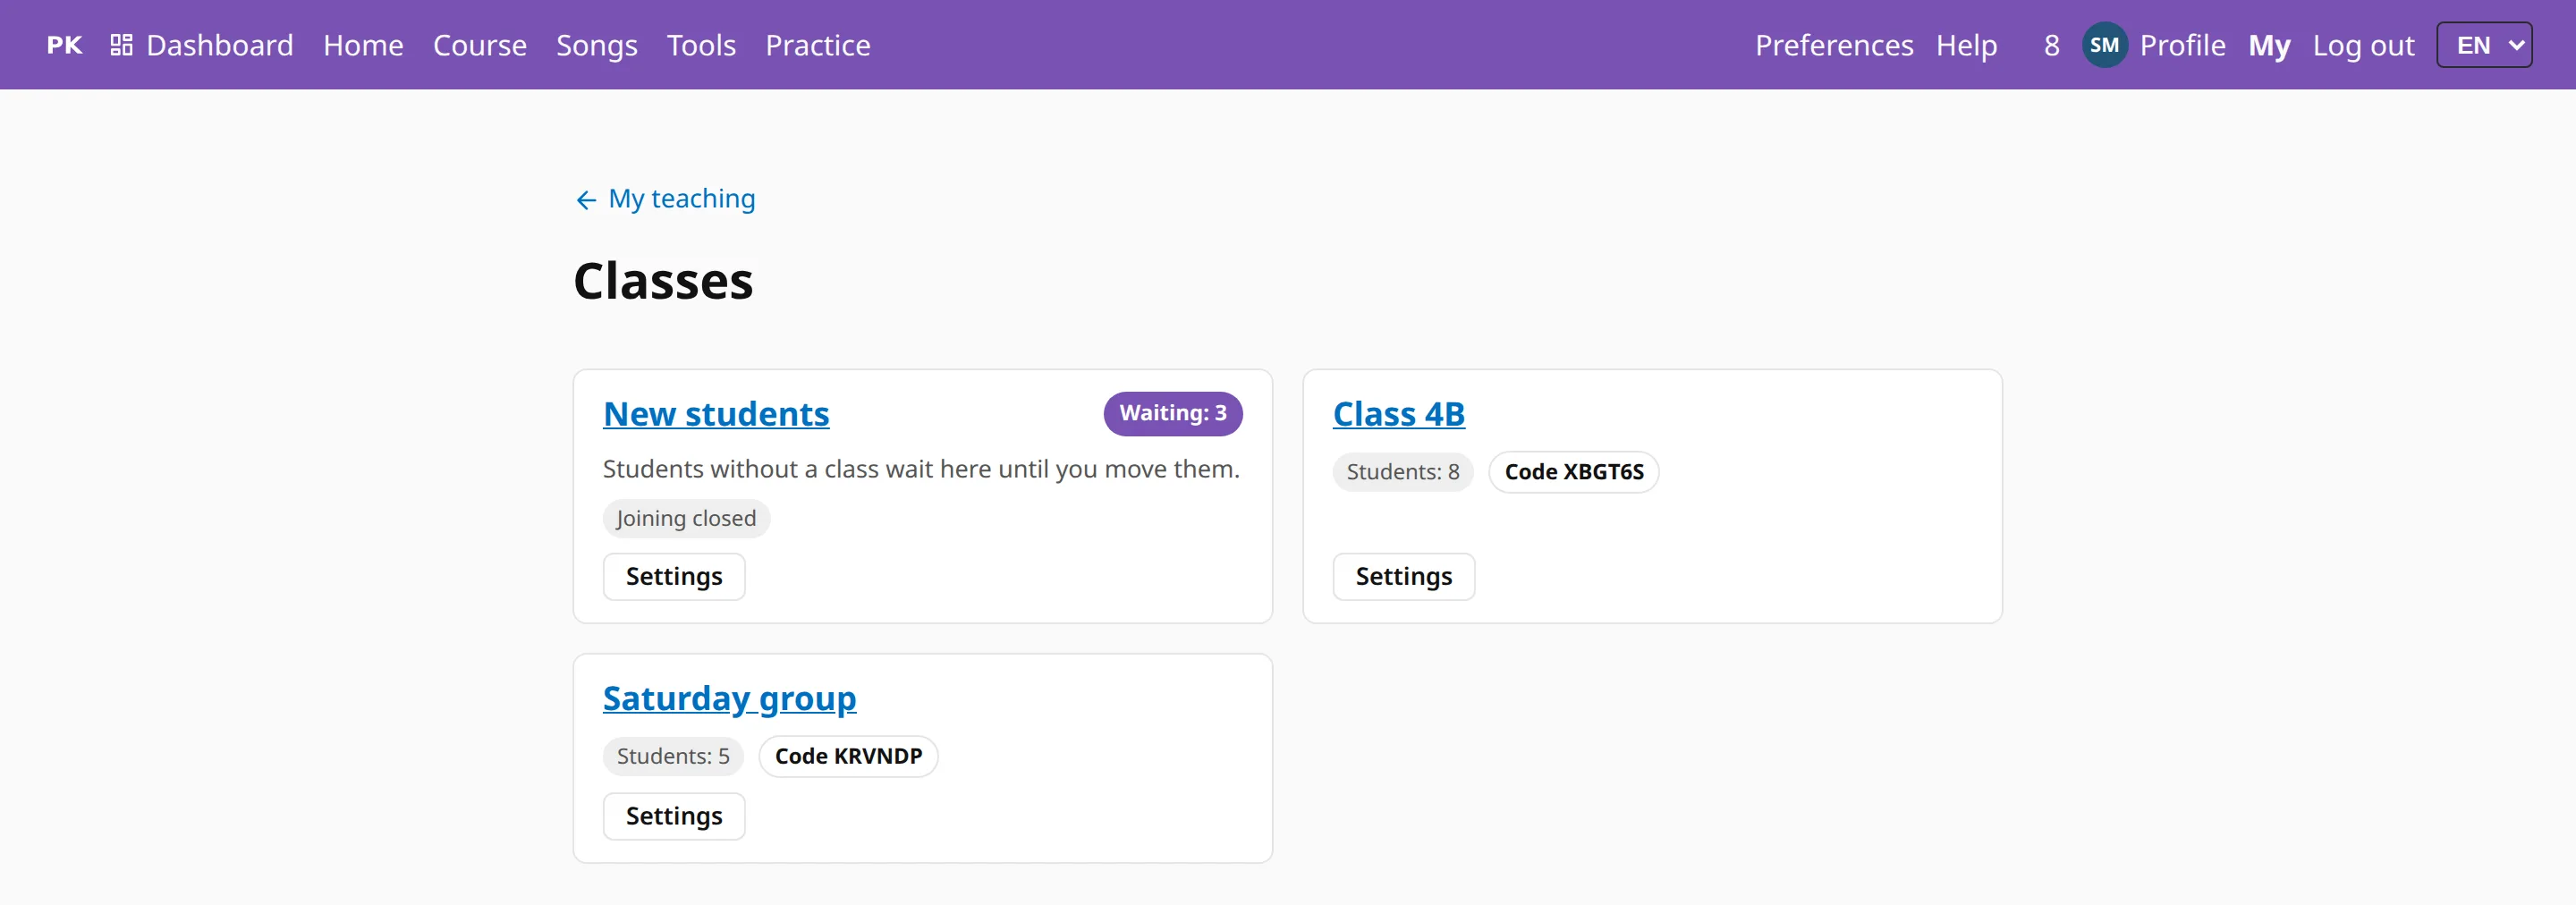
Open Classes from My teaching. Press Create class, type a name in Class name and save. You can have up to 20 classes.
Each class has a join code of six characters and a QR code. Both are in the class settings, under Class code. New code replaces the code, and codes you already shared stop working. Close joining stops new students, and you can open it again later.
You also have a class called New students. New students land there first. Tick one student or several, choose Move to… and pick a class. The class list shows how many are waiting. This class is always there, so it cannot be archived.
Students join with a code
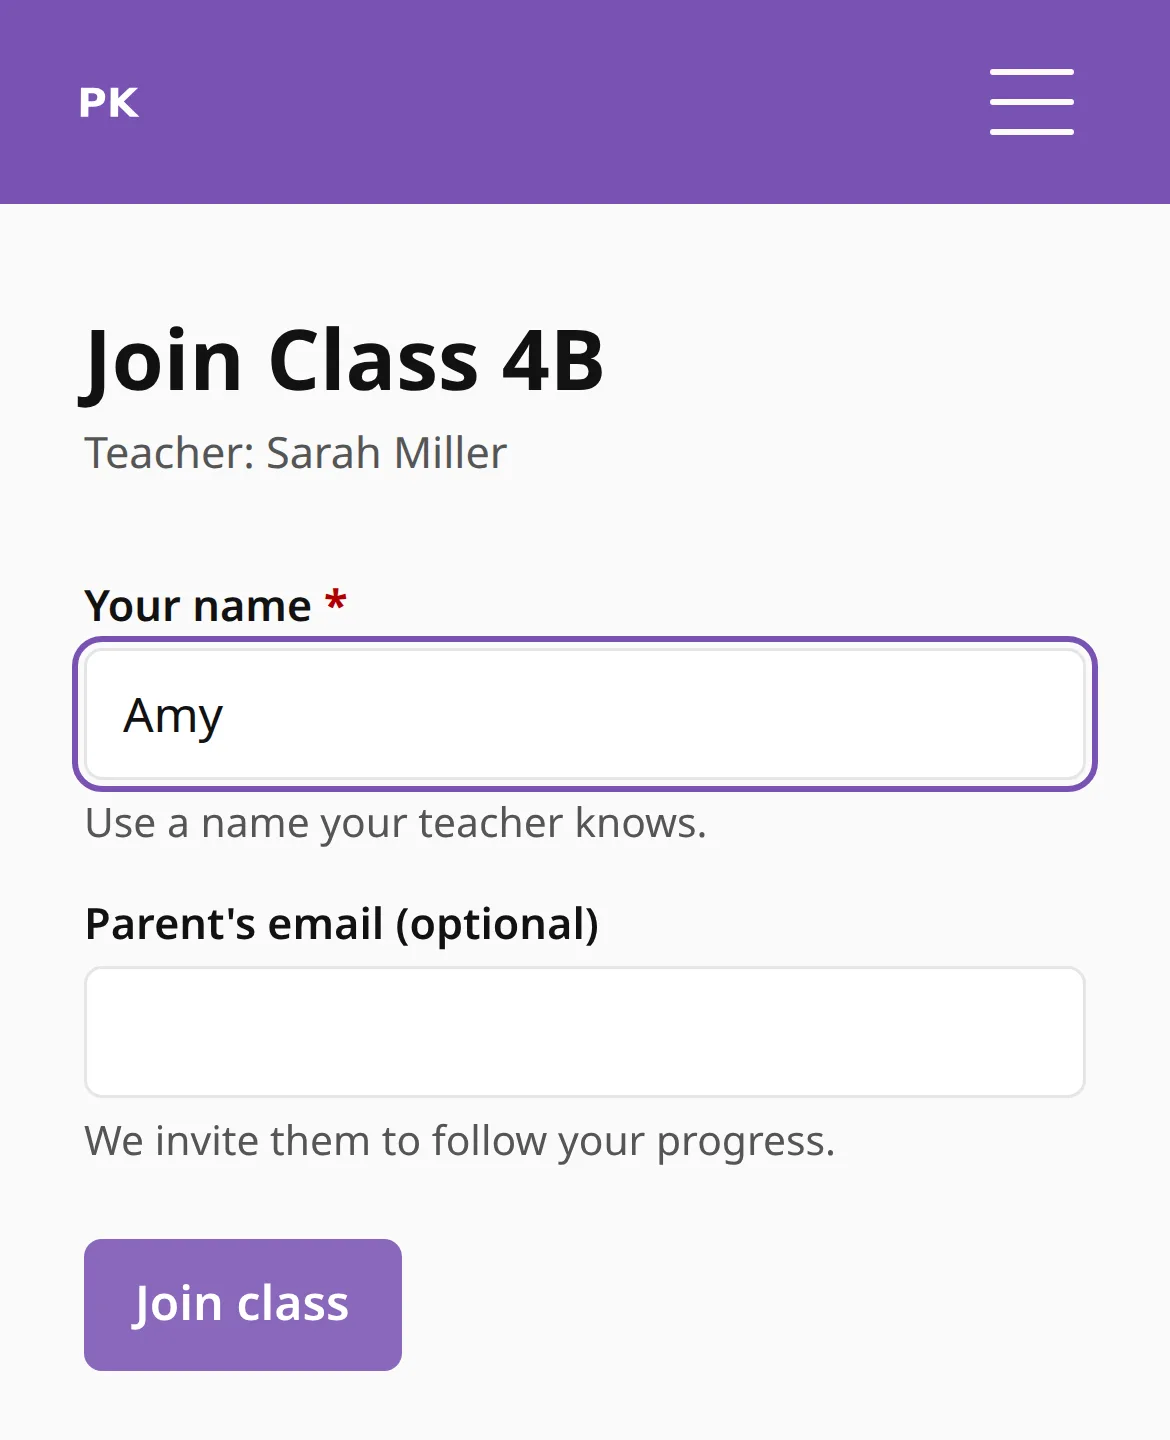
Students scan the QR code or open the class link, which ends in the code. The page shows the class and the teacher’s name. They type a first name and, if they like, a parent’s email. Then they press Join class.
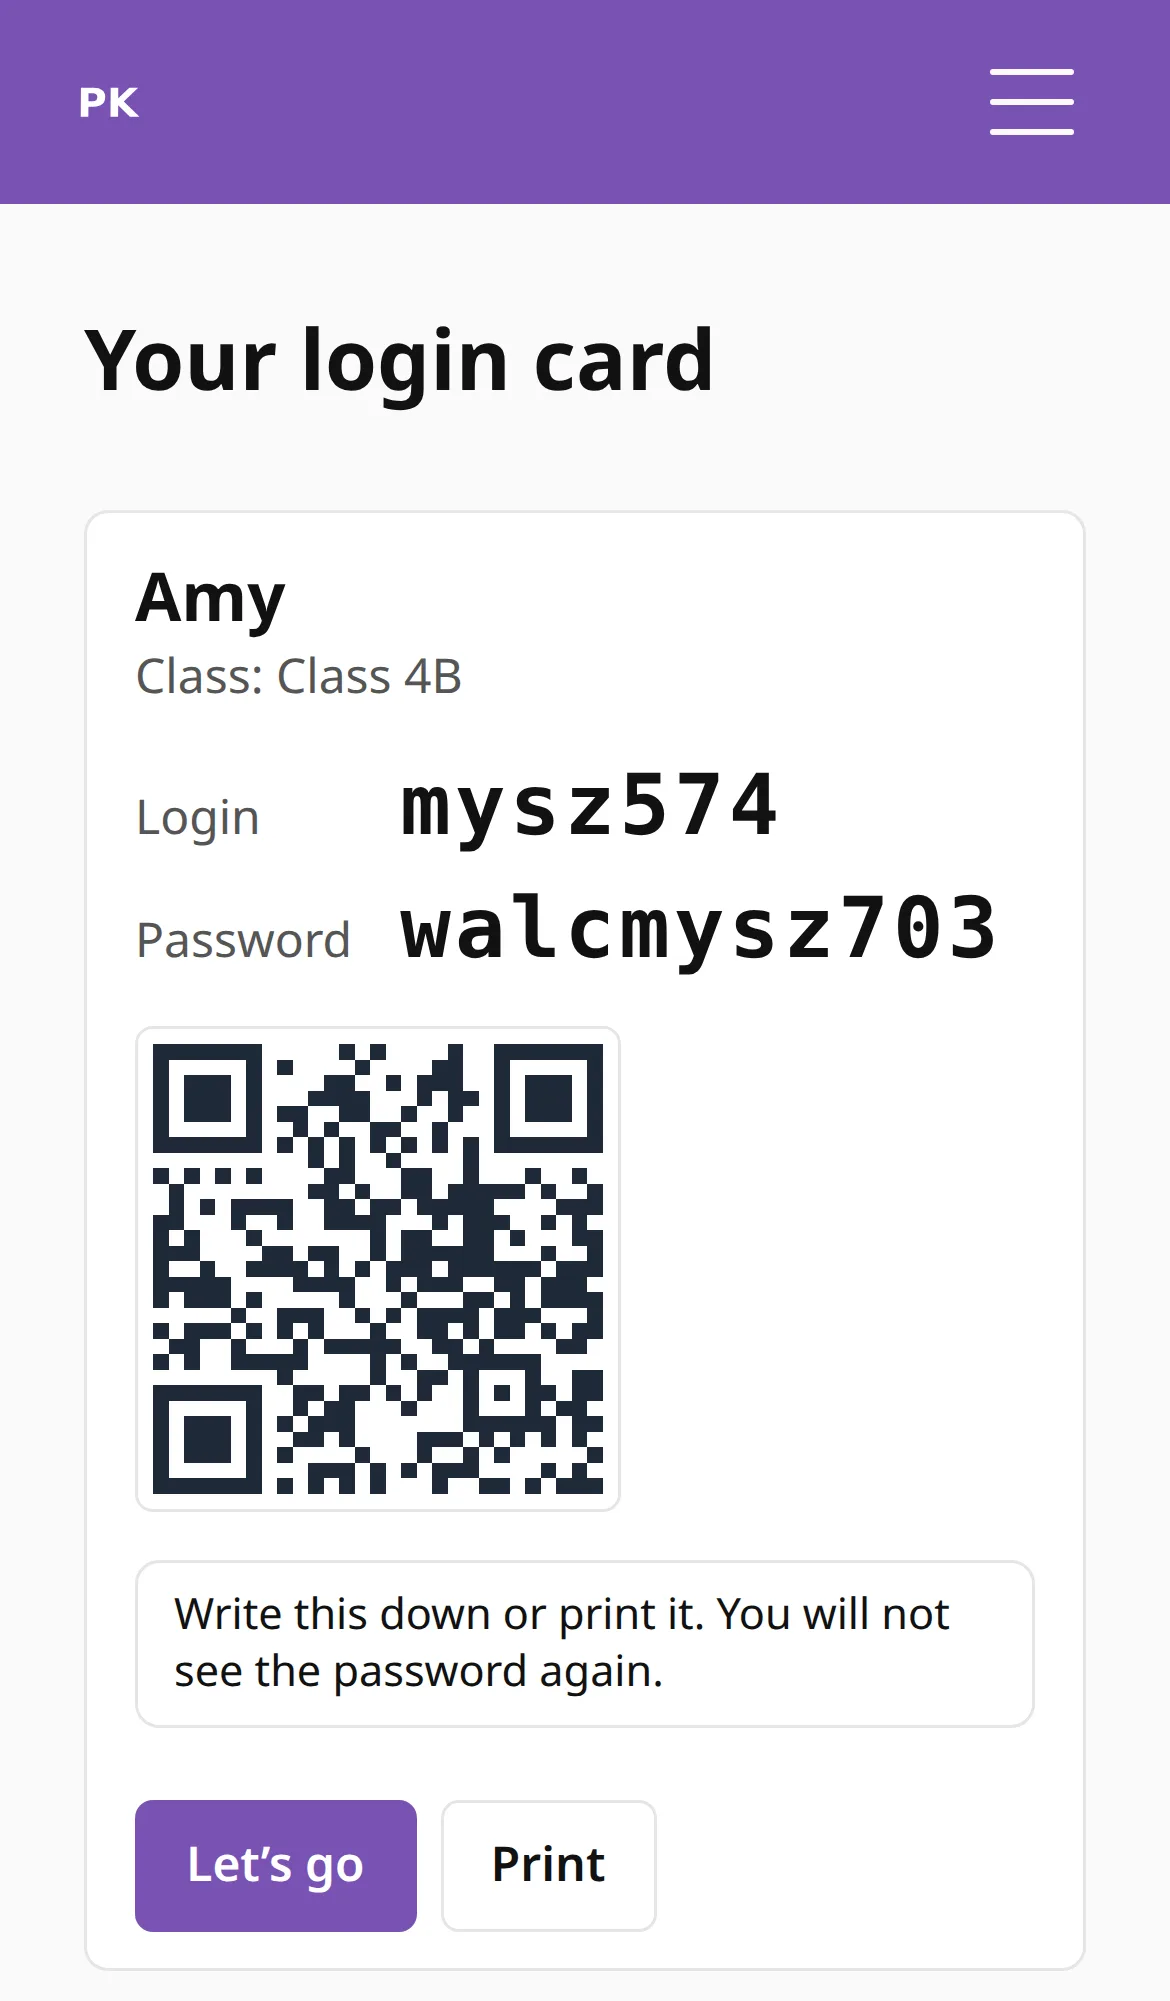
Each student gets their own account, with no email address. A login card appears once, with the login ID and the password. They write it down or print it. The password is not shown again.
Reset passwords & print cards makes new login cards for the whole class at once. Reset password does one student. The old password stops working. Accounts managed by a parent are skipped.
Parents join later
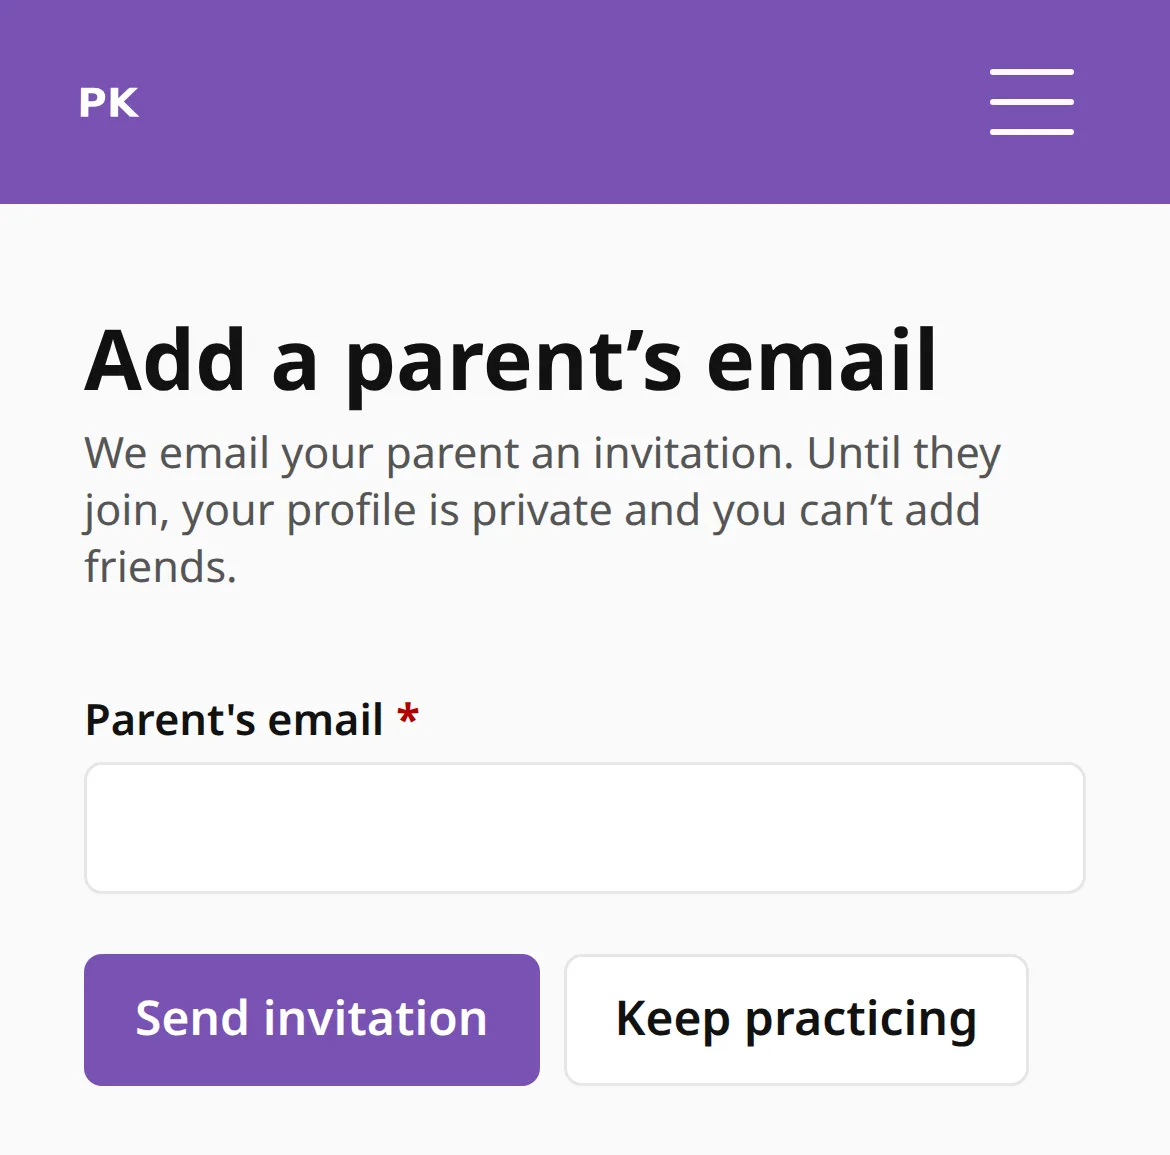
A parent’s email is optional when joining. From day one the student and you both see a prompt to add it. After 14 days the student is asked at every login. Practice still works.
Until a parent is linked, the student is private: no public profile and no friend requests. When the parent accepts, they take over the account. You keep seeing the progress. The parent side is on For parents.
The class board
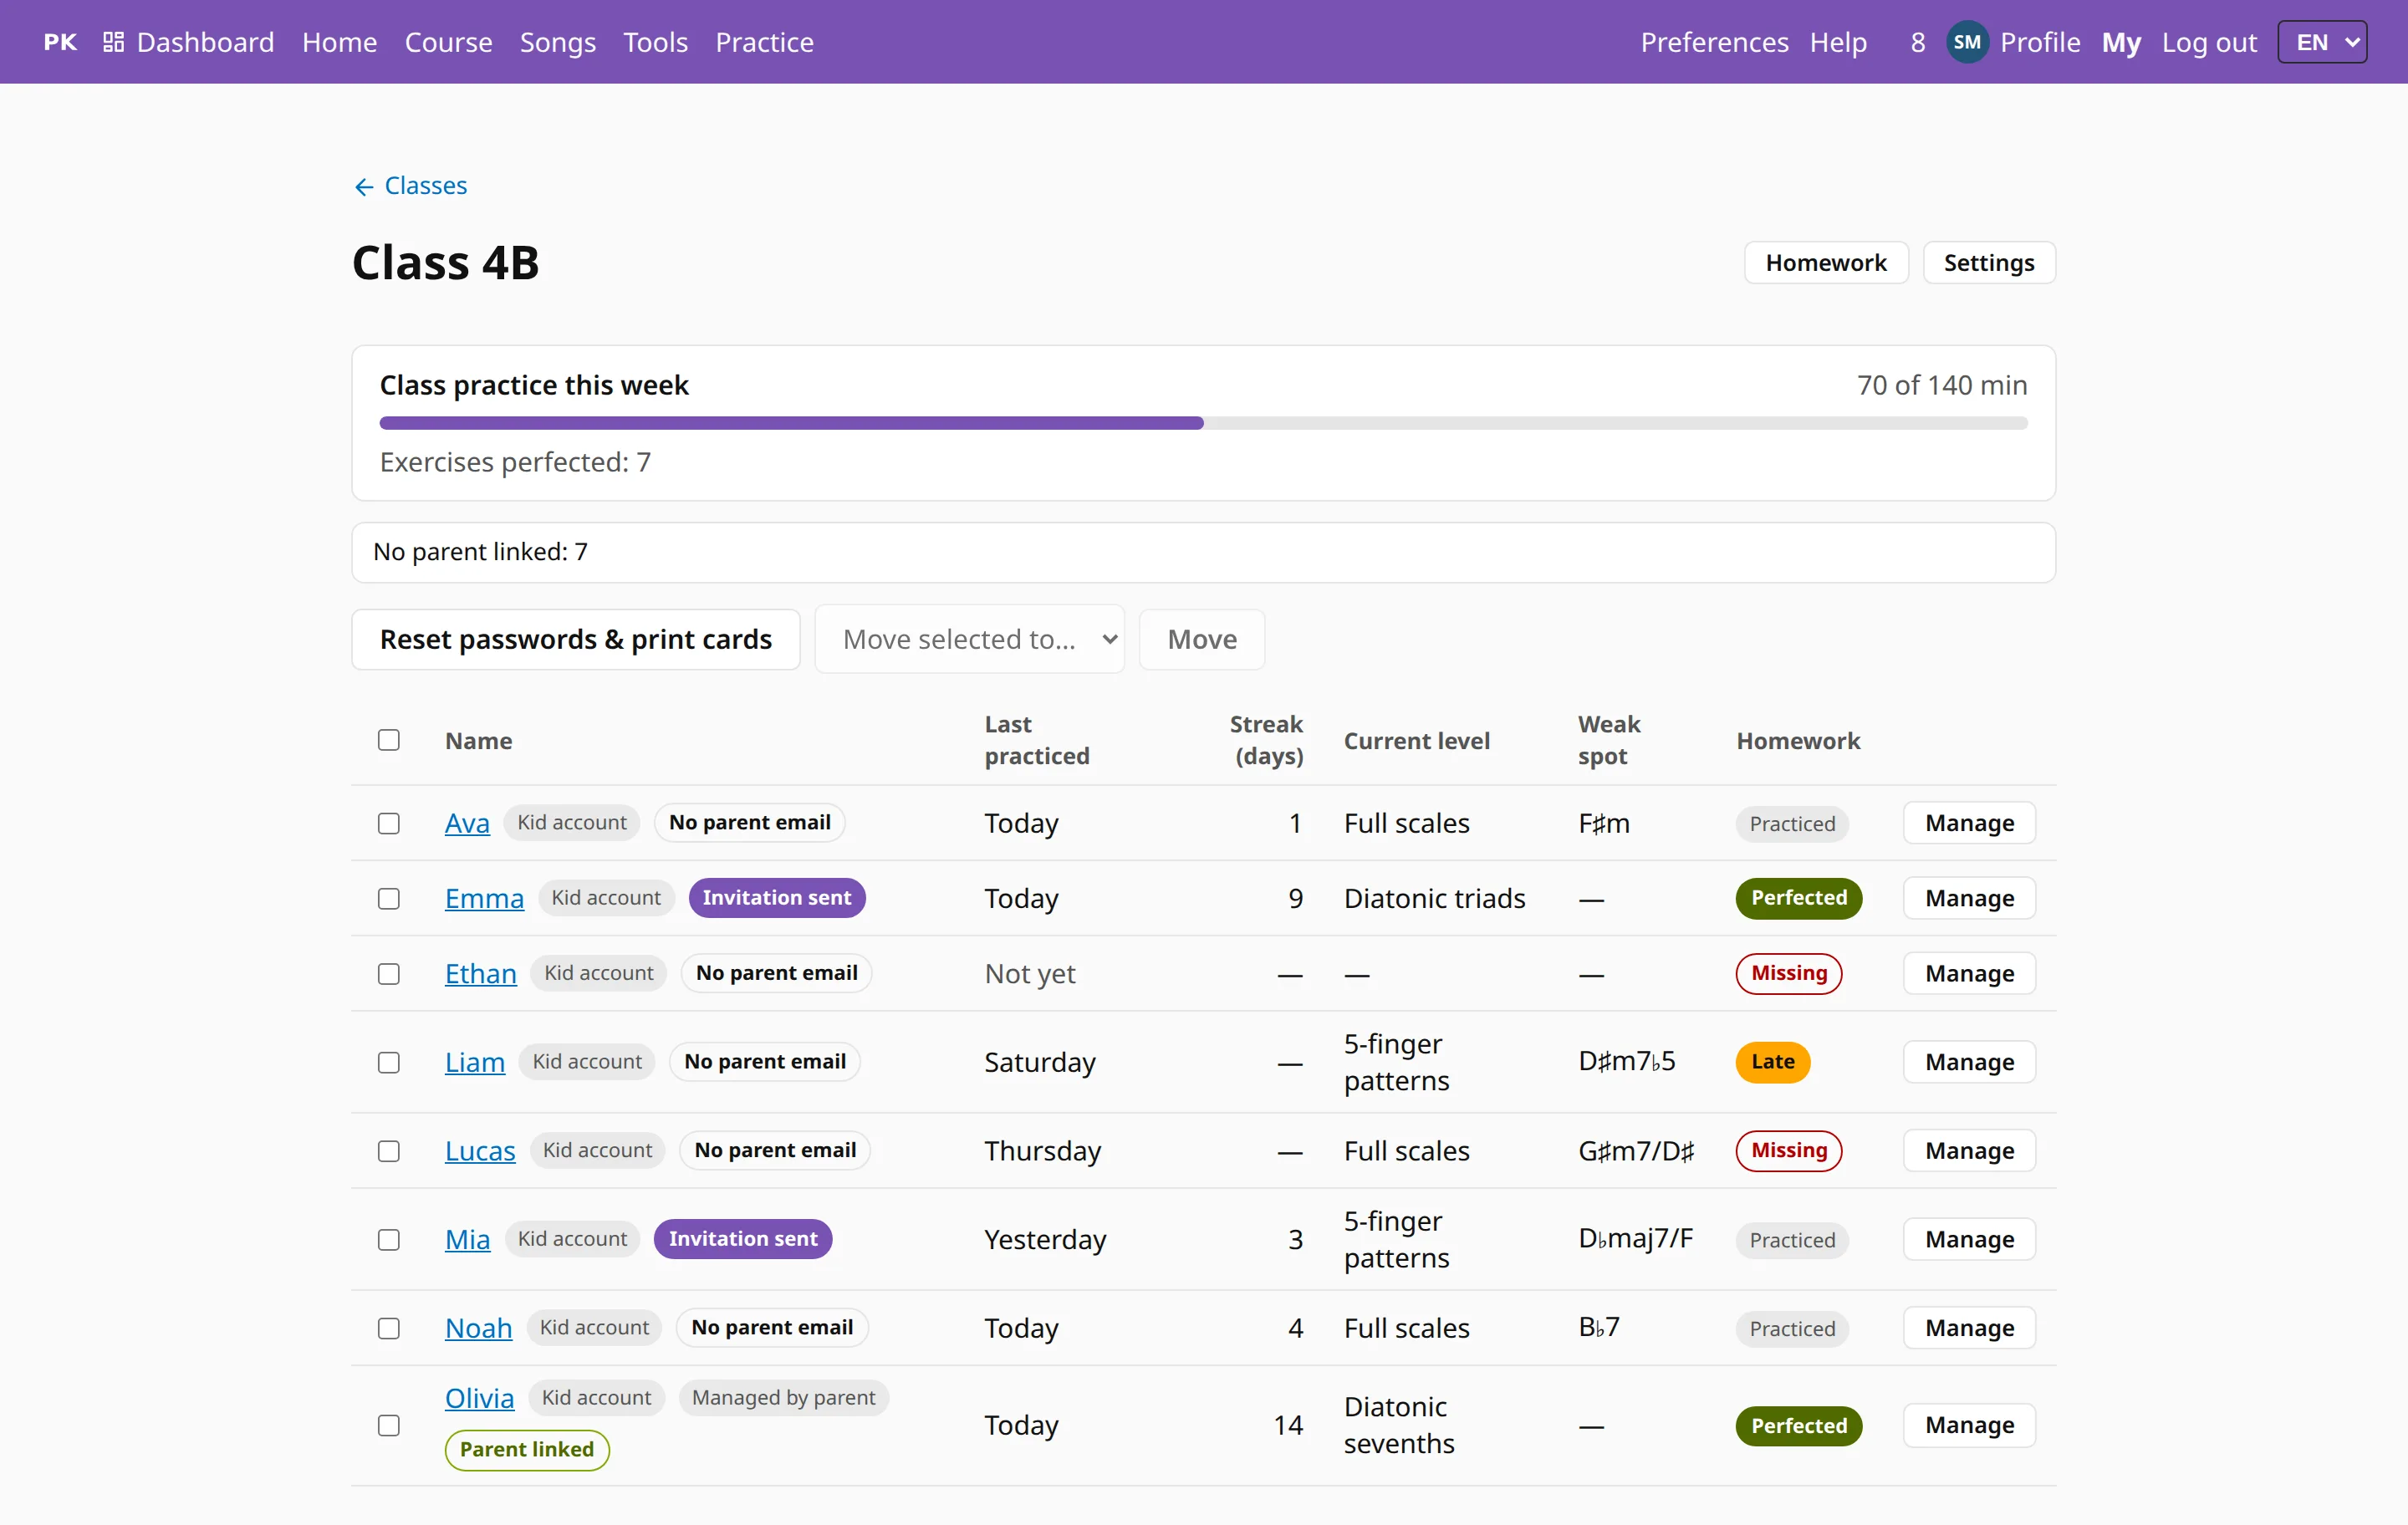
Open a class to see its board. Each student has one row: last practice, streak, current level, weak spot, parent status and homework status. Above the grid are the class’s minutes this week against the goal, and the number of exercises perfected. Set the goal in the class settings, in Weekly goal (minutes).
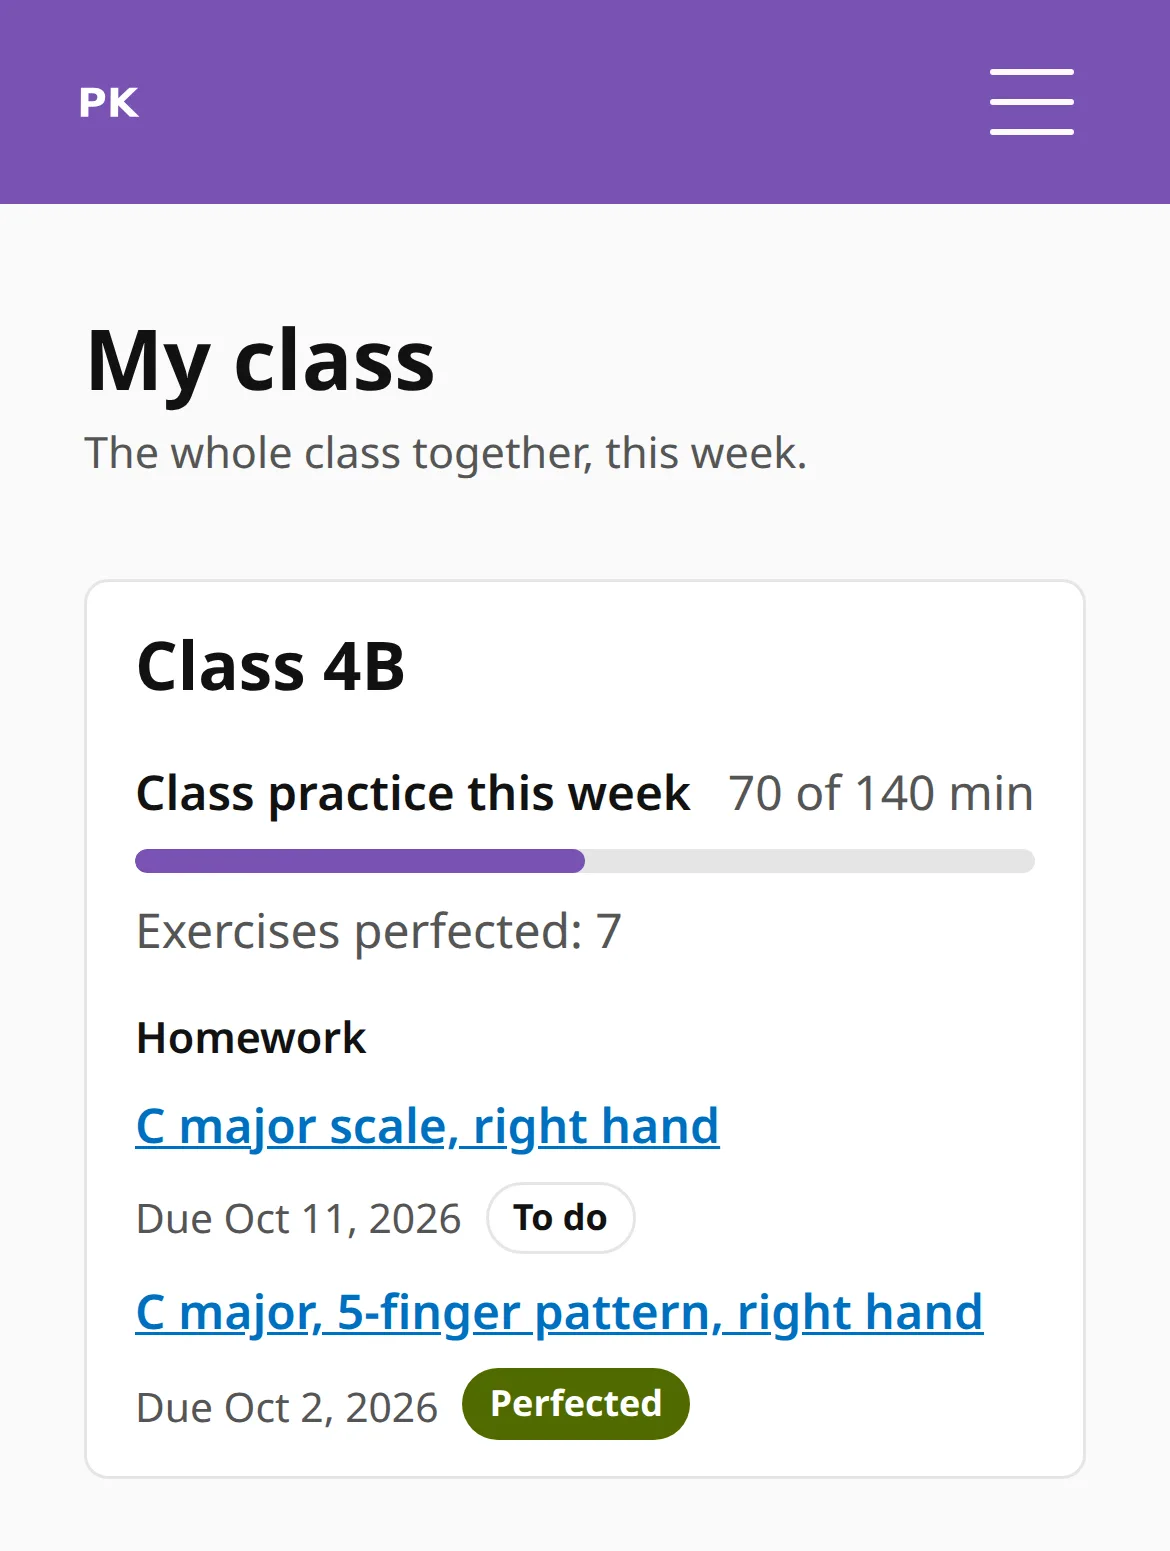
Students see only the class totals: minutes against the goal and exercises perfected. No names, no ranking. They find them under My class.
Homework for a whole class
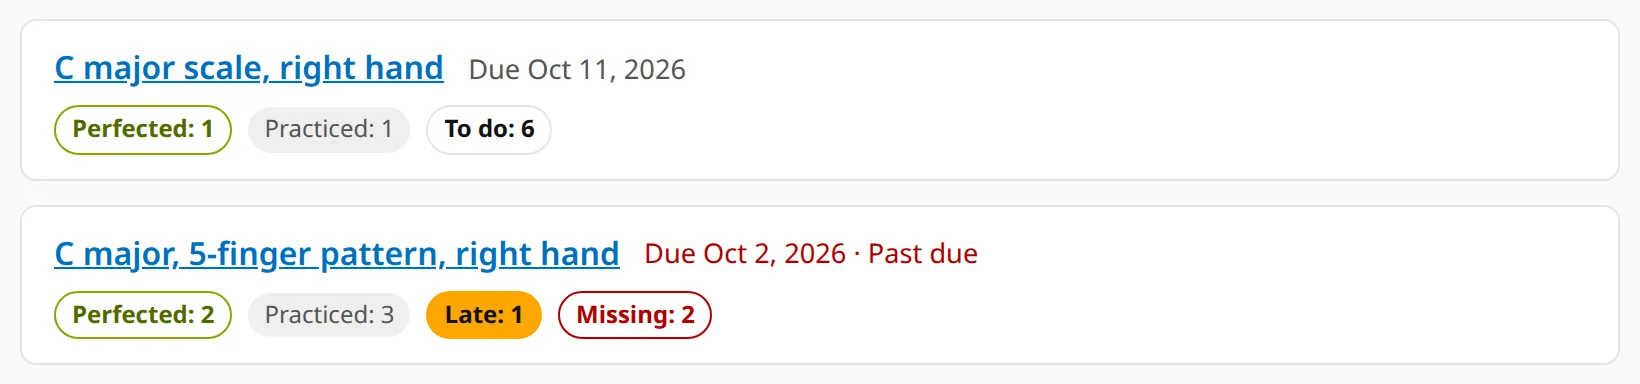
Send an exercise to a whole class and set a due date. Practiced means the student played it at all. Perfected means it was played at 99% or better. Late and missing homework shows on the class board.
Students get a push notification the day before it is due. Push is explained in notifications.
A summary every Monday
Every Monday at 08:00 in your time zone you get an email. It lists who practiced, who did not, who hit the goal and who is missing homework. Switch it off for one class with Monday summary email in the class settings.
See your students’ progress
The roster has five views. Today shows minutes and coins today, whether the streak was kept and whether the daily goal was reached. Practice shows the week’s minutes, exercises in the last seven days and the last practice date. Progress shows the current and best streak and the coins. Goals shows each student’s top goal, and This week shows a bar for every day. A student who has not practiced for seven days gets a Quiet tag.
Details opens one student: today, the last seven days, the streak, recent exercises with their accuracy and number of runs, goals and everything you have shared with them. Sessions lists every practice session. Open one to see the correct and wrong counts, the accuracy, the best streak and the exercises played in it.
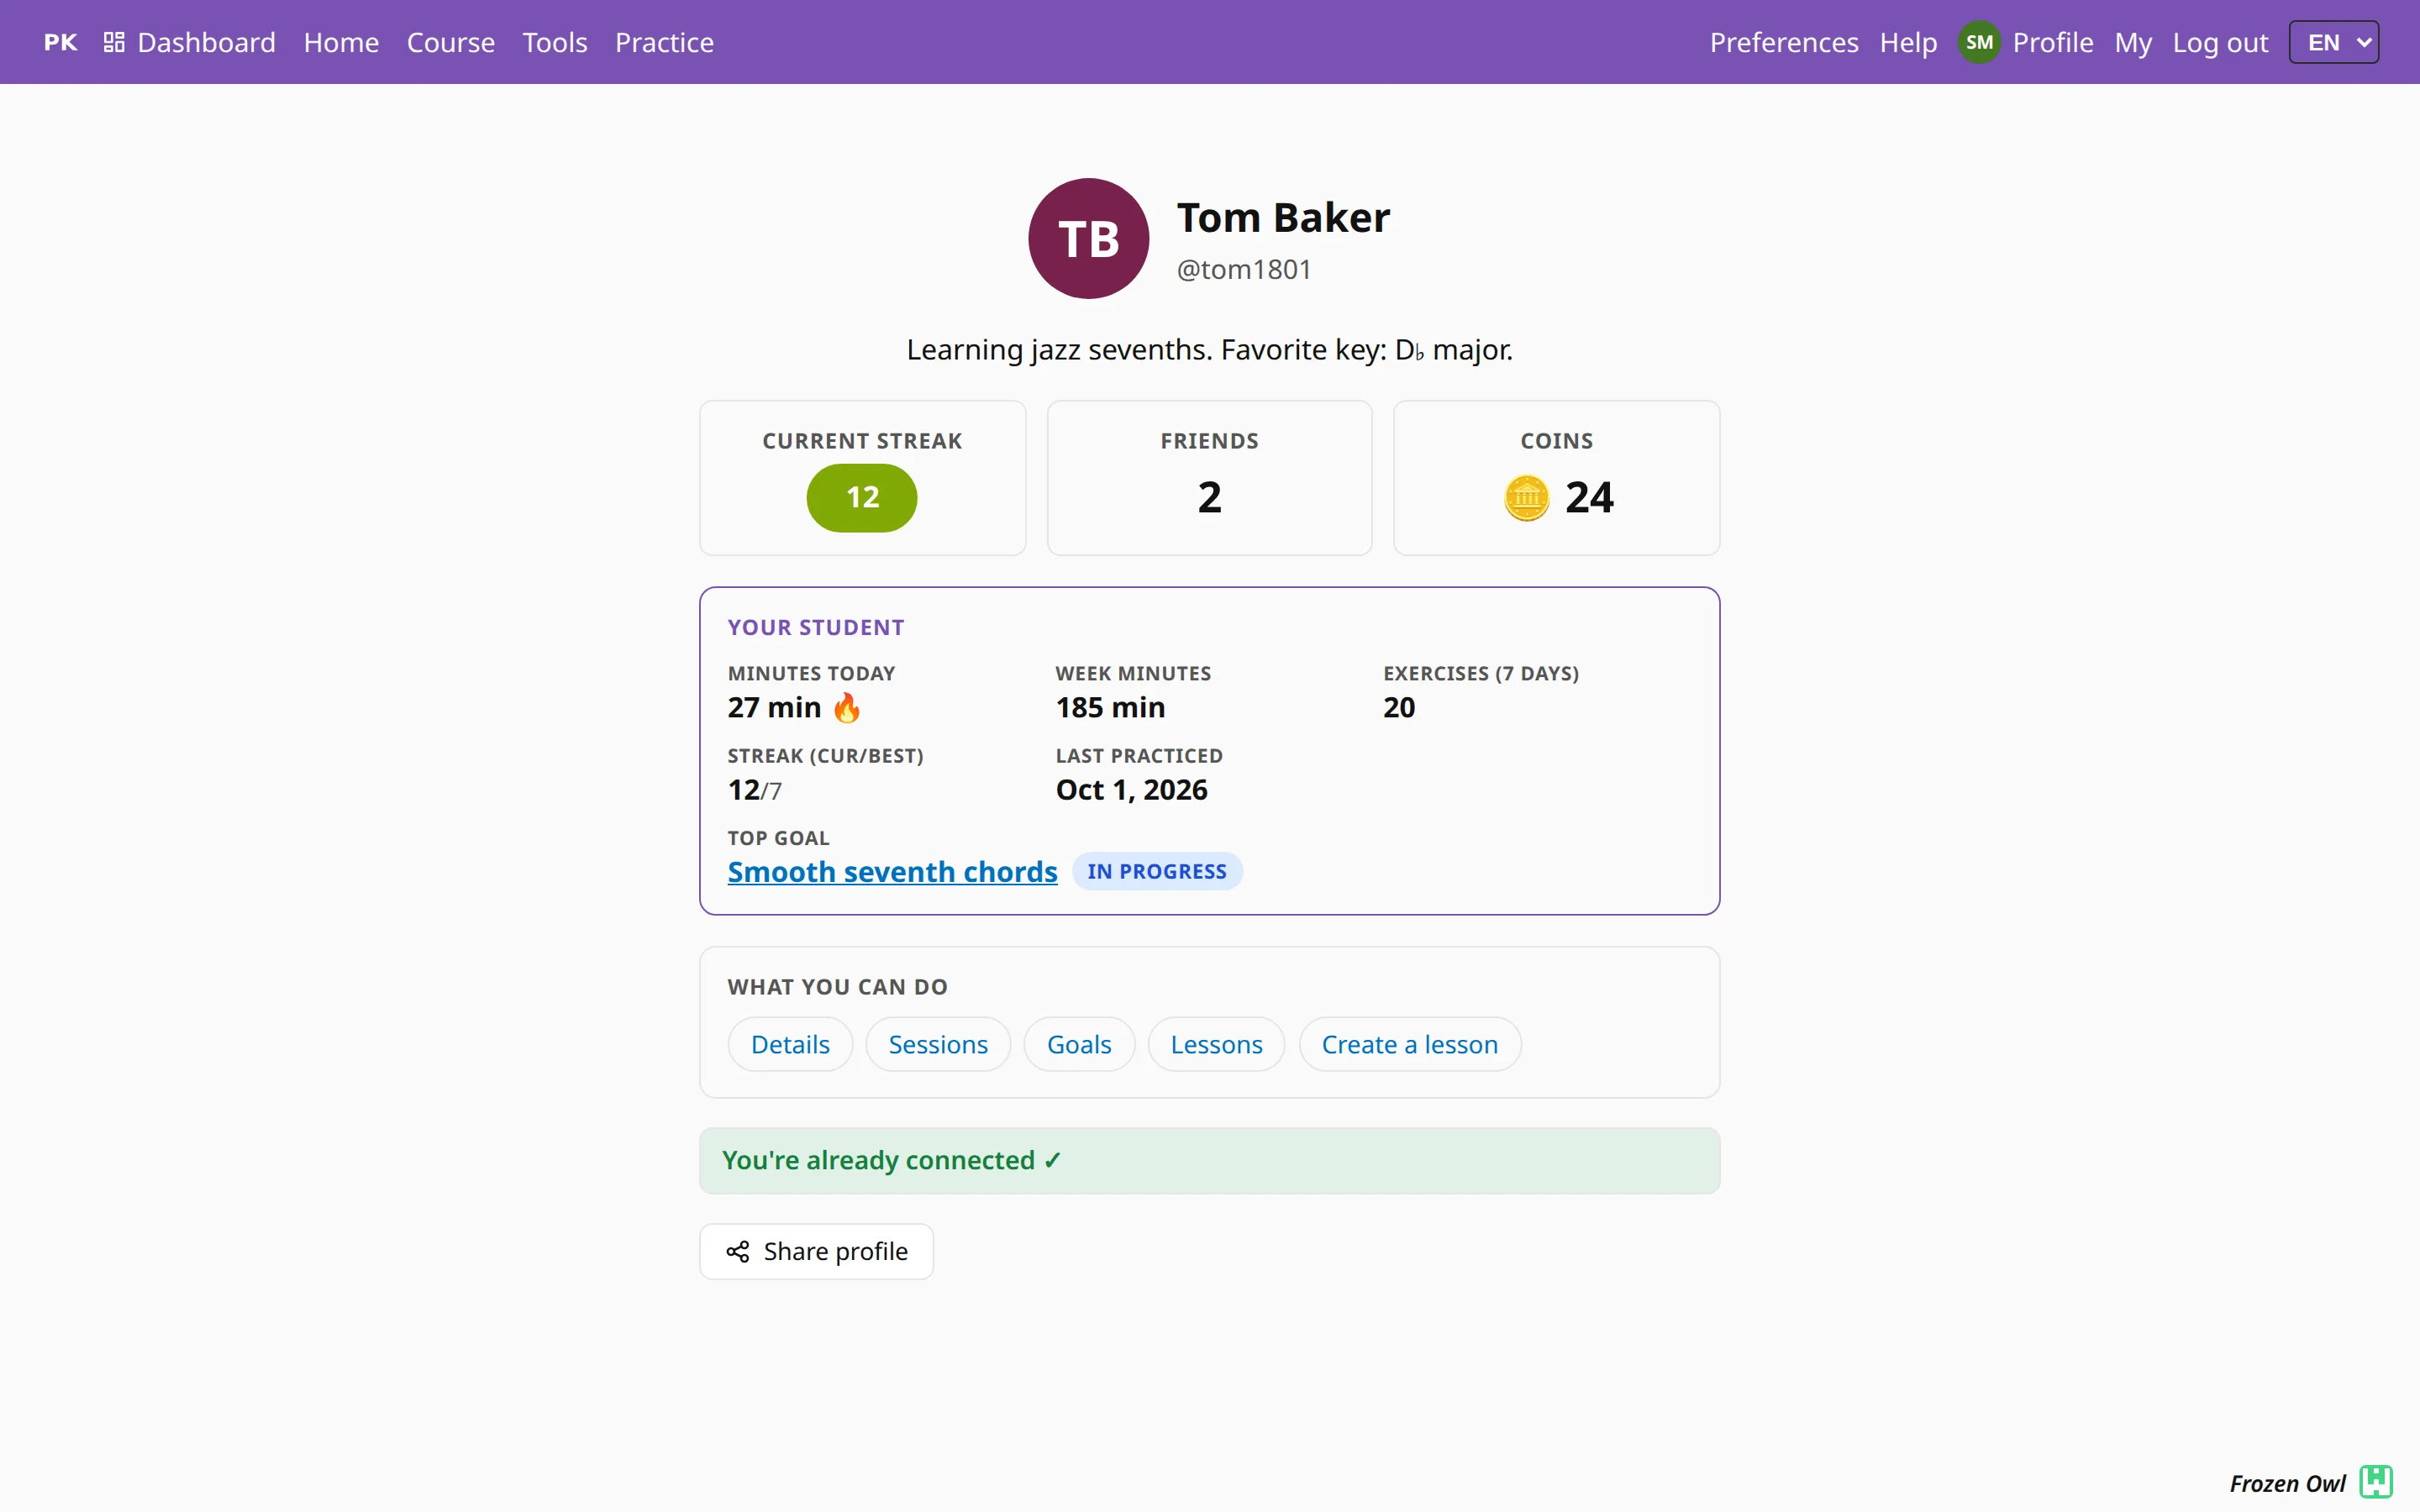
A teacher gets every permission listed in Who sees what on People: detailed stats, weekly summary, activity feed, exercise history, milestone notifications, goals and lessons. The milestone one means a dashboard message when a student’s streak reaches 7, 14, 30, 50, 100, 200, 365, 500 or 1000 days. How the table works is explained in Friends and the activity feed.
Manage their goals
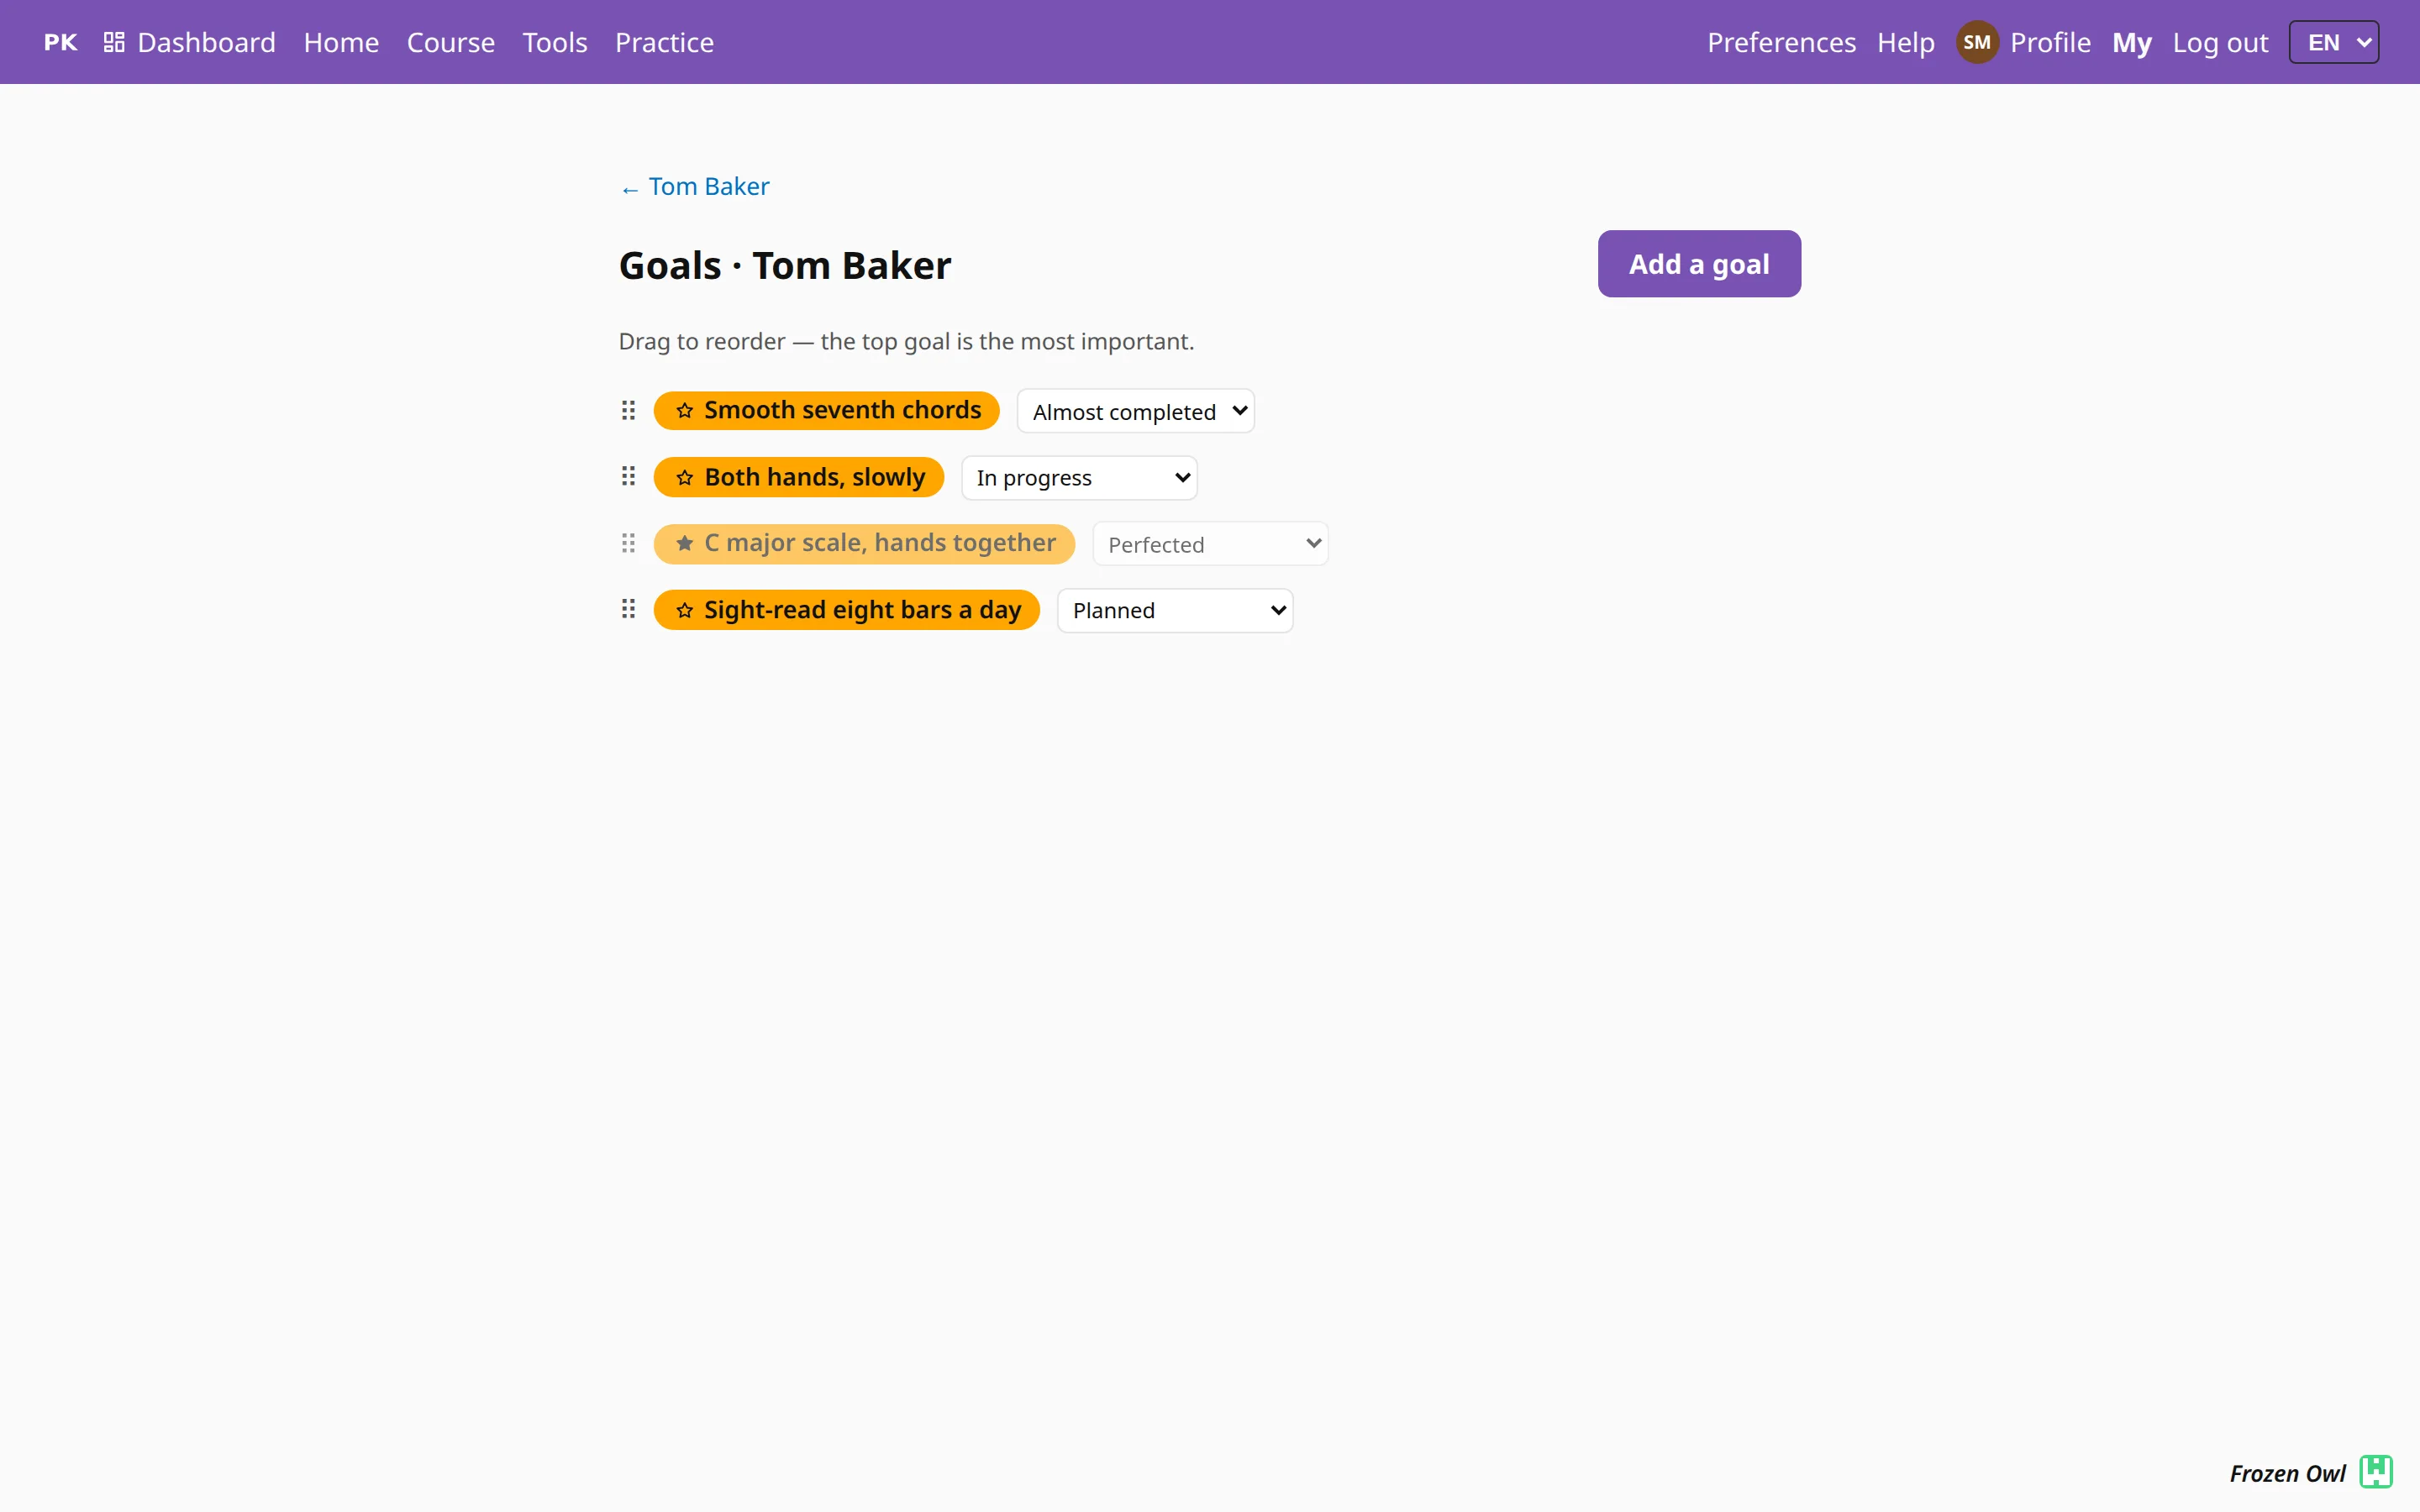
In a student’s row, open the ⋯ menu and choose Goals. Press Add a goal, give it a name and a description, and drag the goals into order; the top one matters most. Each goal is Planned, In progress, Almost completed or Perfected, and only you move it between stages. The student gets a message when you do. Exercise links in a description become practice cards on the student’s page.
A lesson needs at least one goal, so a new student gets a first goal before the first lesson. Stages, history and what students and parents see are on the Goals page.
Plan and manage their lessons
In the same ⋯ menu choose Create a lesson. Pick at least one goal and, if you like, an exercise list, notes and links. Then press Start now, or press Start later, set a time and press Save. The form is described in Planning a lesson. Upcoming lessons are listed at the top of My teaching, and Lessons in the student’s menu shows the earlier ones.
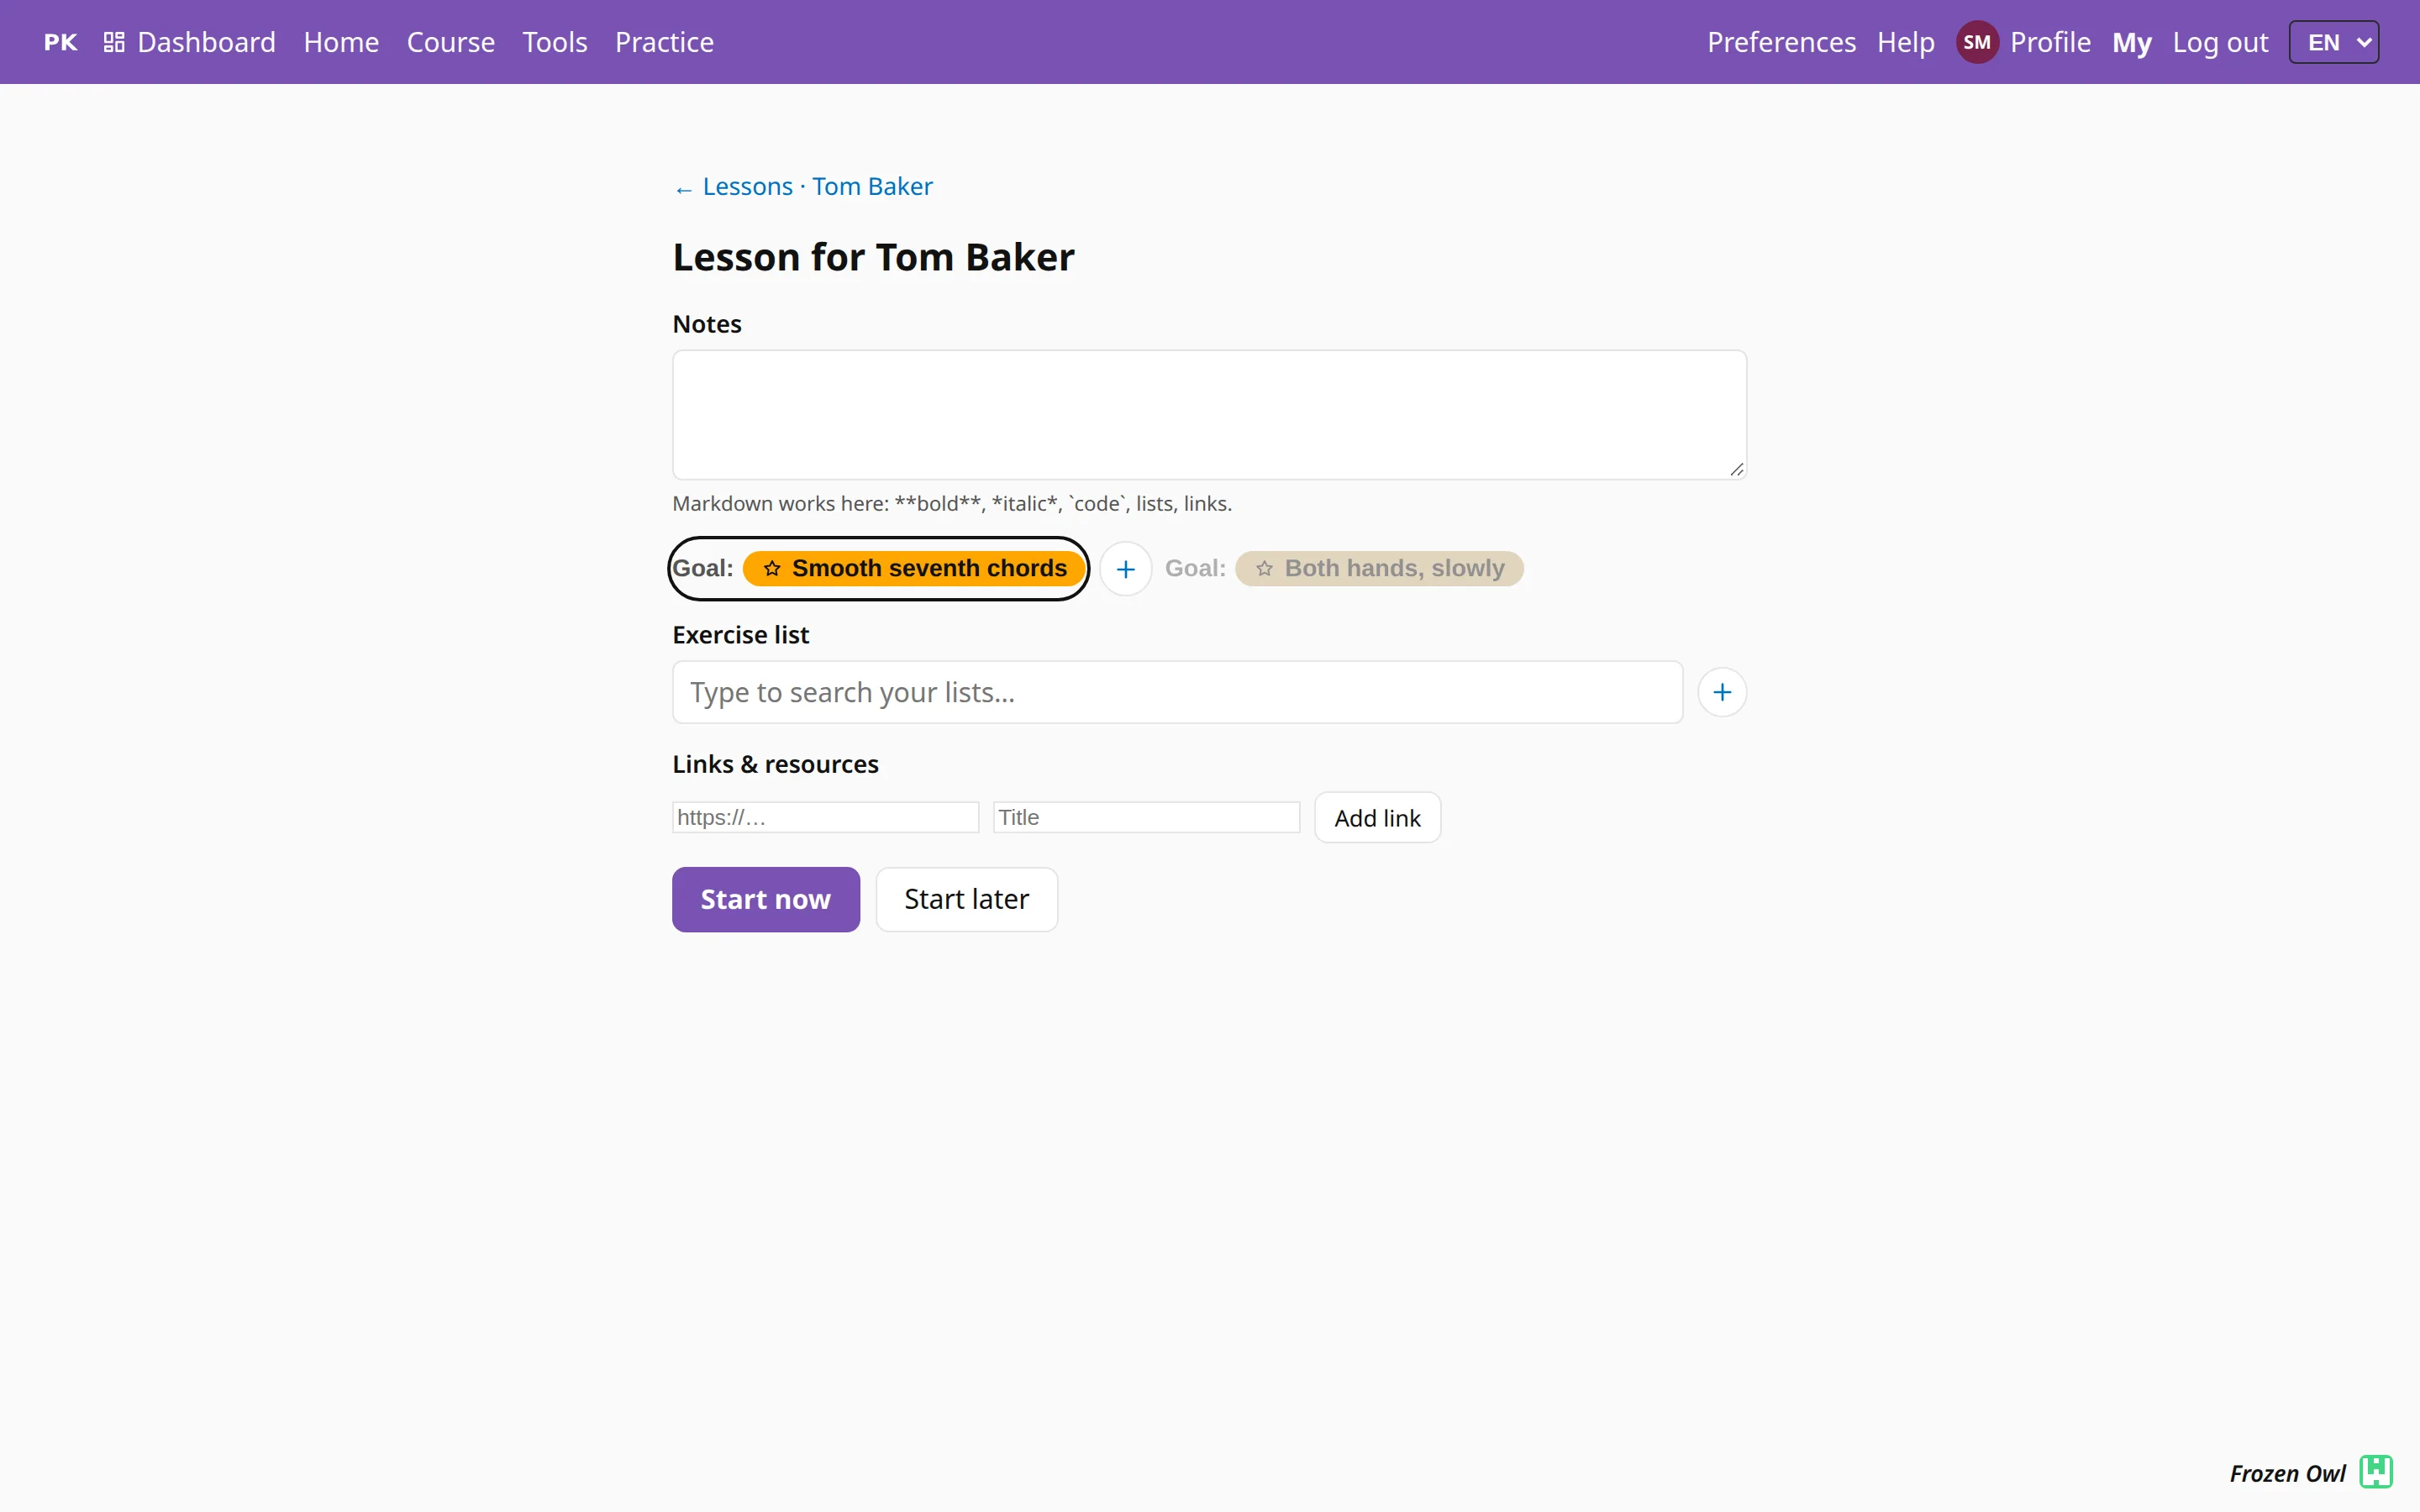
A lesson is shared with the student the moment it exists. A planned lesson sends the student and their parents a notification and shows up under My learning. On the lesson page, the Calendar row offers an .ics file and a gCalendar link while the lesson is planned.
The lesson is Planned until you press Start lesson, which notifies the student, then In progress, and Ended after End lesson, which sends the student the notes and the results. A lesson you forget to end closes itself after two hours, or when the student stops playing, whichever is later. For the same slot every week, press Repeat this lesson on a lesson, or Copy the last lesson (goals + list) on the new-lesson form: both copy the goals, the list, the notes and the links. Notes, the practiced list and the read-only link for parents are in The lesson log; messages to students are in notifications.
Share exercises with them
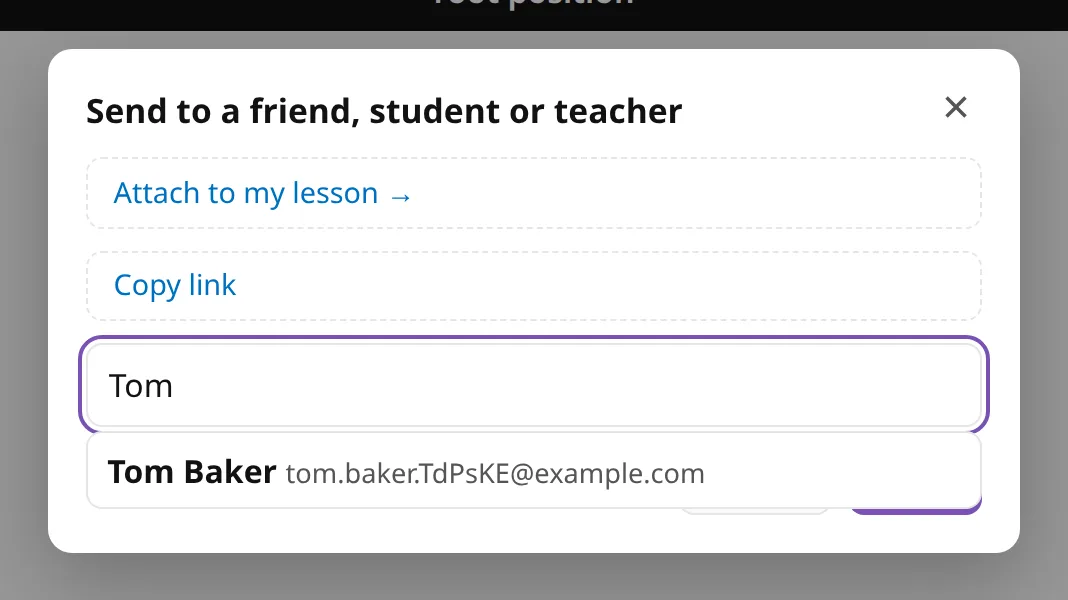
Set up an exercise, then press the share icon in the bottom bar of the practice screen, titled “Send to a friend, student or teacher”. Type the student’s name or email, add a message if you like and press Send. The student gets the exercise with all its settings as a message on the dashboard and as an email in their language, and finds it under Shared with me. Friends can be sent exercises too, but without a message.
To send a whole list, open it in the list editor, untick Private and press Send to…. My shared links shows what you sent, to whom, and whether it was opened. For your students it also shows the results on each shared exercise: best and latest accuracy, the number of runs and the date it was completed, or “Not started yet”. On a student’s Details page, everything you shared with them is listed together. More in Share an exercise or a list.
Prepare exercises for a lesson
The shortest route from nothing to a lesson with its own exercise list:
- In the student’s ⋯ menu choose Create a lesson.
- Next to Exercise list press the + button (“New list”), then Create list. The name already has the student and the date in it, and the new list is ready to be shared and selected.
- Press Edit beside the list. The editor opens in a new tab and saves as you type.
- Press Quick add and paste one exercise per line. A line can hold a link (a video, an image, a PDF or an exercise), a tempo such as “80 bpm” and a time such as “10 min”; the rest becomes the name. The details are in Exercise lists.
- Go back to the lesson form and press Start now or Start later.
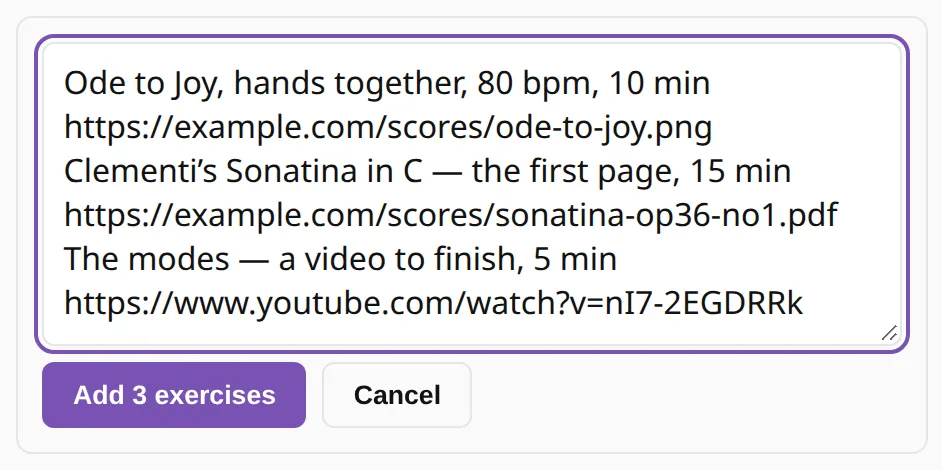
Other quick ways to fill a list or a lesson:
- Set the exercise up, open Preferences and press Add to list under the exercise card. It goes into the list you edited last, or into a new list, and the editor opens with the new item selected. A list created this way is private, so untick Private before attaching it to a lesson.
- Press Copy link in the share box with Shift held to get the long form of an exercise link. Quick add recognizes it as a PianoKitty exercise; a short link is stored as a plain link.
- Paste exercise links, YouTube videos or list links into the notes of a lesson. They line up below the notes as exercise cards, embedded videos and list links, up to six of each kind.
- Press Create similar in the list options to copy last week’s list and edit the copy.
Lesson resources
Each lesson has a Links & resources section. Enter a web address and an optional title, press Add link, and the student can open it in a new tab. A lesson holds up to 24 links, and the new-lesson form has the same fields.
Two shortcuts add a link without typing it:
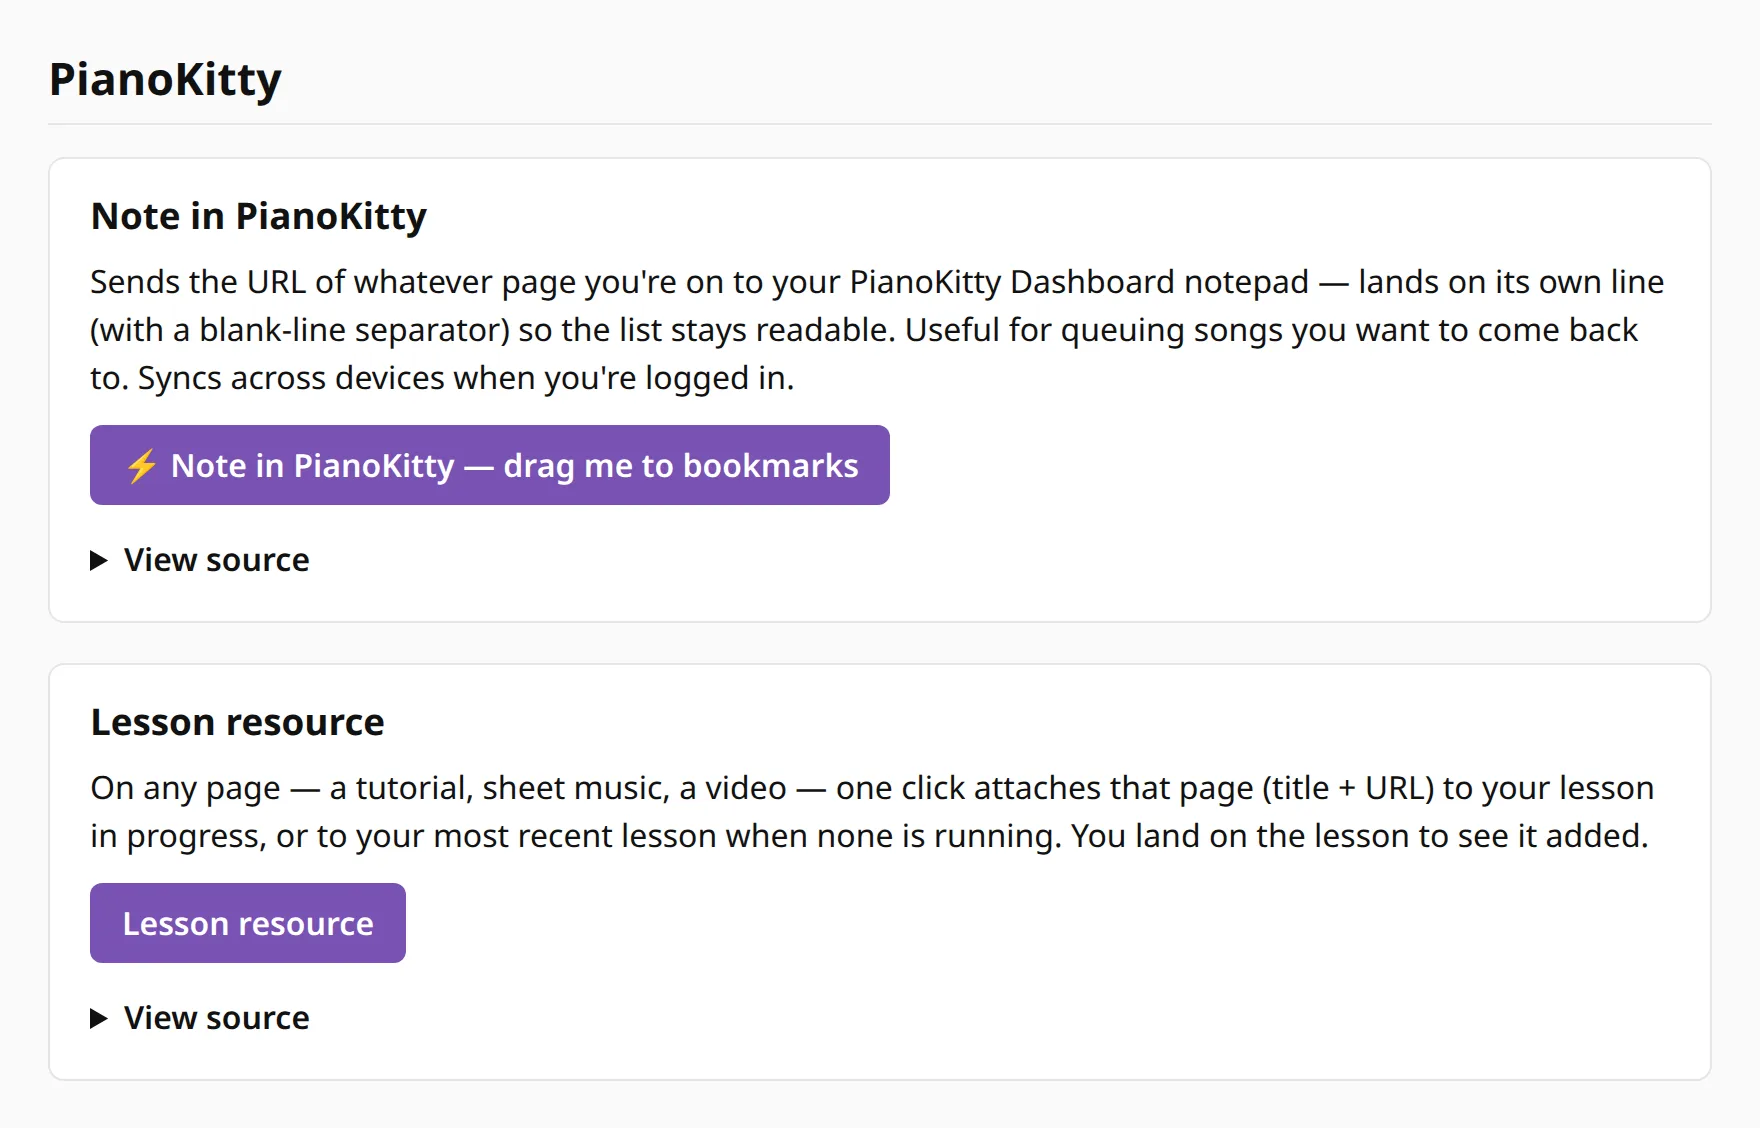
- The Lesson resource bookmarklet on Bookmarklets. Drag it to the bookmarks bar. On any page, such as a tutorial, sheet music or a video, one click adds the page’s title and address to the lesson in progress, or to your most recent lesson if none is running, and opens that lesson. See Send to PianoKitty.
- Attach to my lesson in the share box on the practice screen adds the current exercise the same way.
Common questions
How do students join a class with a code?
They scan the QR code or open the class link. They type a first name, add a parent’s email if they like, and press join. Then they get their own account and a login card.
The code and the QR are in the class settings, in Classes.
Does a child need an email address?
No. The account is made without one. The child signs in with the login ID and password from the login card. The card appears once, so it is written down or printed. You can reset passwords and print cards for the whole class. For the account itself, see For parents.
What about privacy until a parent joins?
Until a parent is linked, the student is private: no public profile and no friend requests. The parent’s email is optional, but after 14 days the child is asked for it at every login. Practice still works. When the parent accepts, they take over the account and you keep seeing the progress. Classmates see only the class totals, never names.
How does homework work?
You send an exercise to a whole class with a due date. Practiced means it was played at all, and perfected means it was played at 99% or better. The class board shows late and missing homework. Students get a push notification the day before it is due.